TUTORIAL - Installation of the sample Android application
Table of contents
1. Introduction
2. The working policy
3. Preparations
4. Download the binary APK file and install it
4.1 Get the APK
4.2 Install the APK to the target Android device
5. Install an APK by building from source
5.1 Preparations for the Android development environment
5.2 Get the source code
5.3 Load the source tree into the Android Studio
5.4 Preparations on the Android device
5.5 Build and install an APK to the Android device

Appendix
A1. Additional setup for the SSL/TLS communication with the broker
1. Introduction
We describe detailed procedures about how to install the tutorial sample application to your Android devices.
The Android screenshots in this document have taken on a Google Pixel4 device, which runs Android 11. There may by some differences in screen layout or explanatory system messages depending on the running environment. Please read through accordingly.
2. The working policy
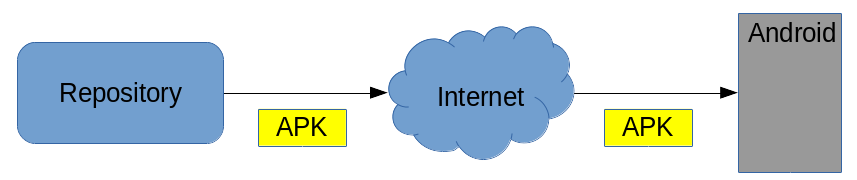
There are two significant choices on the installation works.
- Download the binary
Android application package(called asAPK) on the target Android device, and directly install theAPKby manual operations.
- Download the source tree which is publicly available on
GitHub. - Build an
APKby yourself on your workstation. - Install the generated
APKto the target Android device via USB cable.
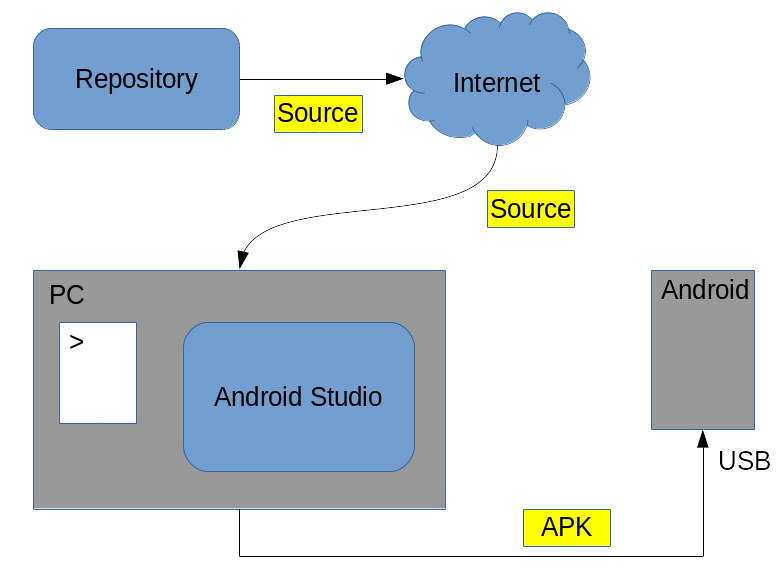
The former is aimed for the ones those who want to try and experience the tutorial application quickly. The latter is aimed for the developers those who intend to work further based on the source code.
3. Preparations
No matter what if you are going to use the downloaded APK as is,
or to build an APK by yourself from source tree, you need to take
some steps on the target Android device.
This is a restriction coming from the fact that the APK is crafted
privately, not distributed from the official
Google Play.
That is, you need to explicitly set your Android device to allow
installing the Unknown Application which is not under the
Google Play control.
Go through following steps.
- Prepare a file management application
- You can use any application which can handle
APKfiles downloaded from the Internet. - Your Android device may already have a file management application, something like a “File Manager”.
- In this document, we suppose to use the Google application Files by Google and describe operations accordingly.
- You can use any application which can handle
- Allow installation of “Unknown applications”
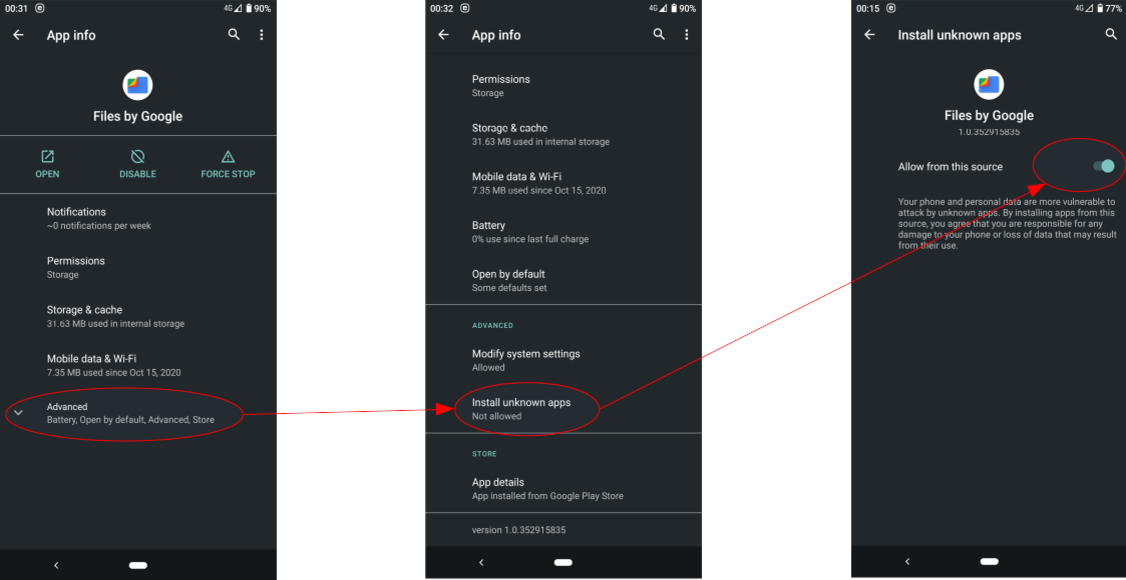
- Open the
Settingsscreen of theFilesapplication as follows.Home --> Settings --> Apps & notifications --> Click `SEE ALL xxx APPS` shown in the middle of the screen. --> Choose `Files` item - On the
App infoscreen of theFilesapplication (left in the figure), expand theAdvanceditem and click theInstall unknown appsitem (center in the figure).
Depending on the Android version, this
Install unknown
apps
item may not be displayed. In such case, skip this step and go ahead.- In the
Install unknown appsscreen (right in the figure), itemAllow from this sourceis disabled and grayed out as default. Slide the switch toward right to enable this item.
- Open the
Once the target application has installed, revert the above settings
Allow from this source to disabled.
4. Download the binary APK file and install it
4.1 Get the APK
Open the Android Chrome application and access to the following URL
to download the target file xxx.apk.
-
STEP1:
Echo, the text send/recv application sinetstream-android-echo v1.8.0 -
STEP2:
Sensor, the sensor data publishing application sinetstream-android-sensor-publisher v1.8.0
Once download has succeeded, the APK will be placed under Downloads
directory of the Android device.
4.2 Install the APK to the target Android device
Once you start the Files application for file manipulation on Android,
you can see the categories list (left in the figure).
If you click Downloads, you can see the list of files in Downloads
screen (center in the figure). Choose the target xxx.apk from there.
Now, a dialog pops up to confirm if you want to install the application.
Click INSTALL here.
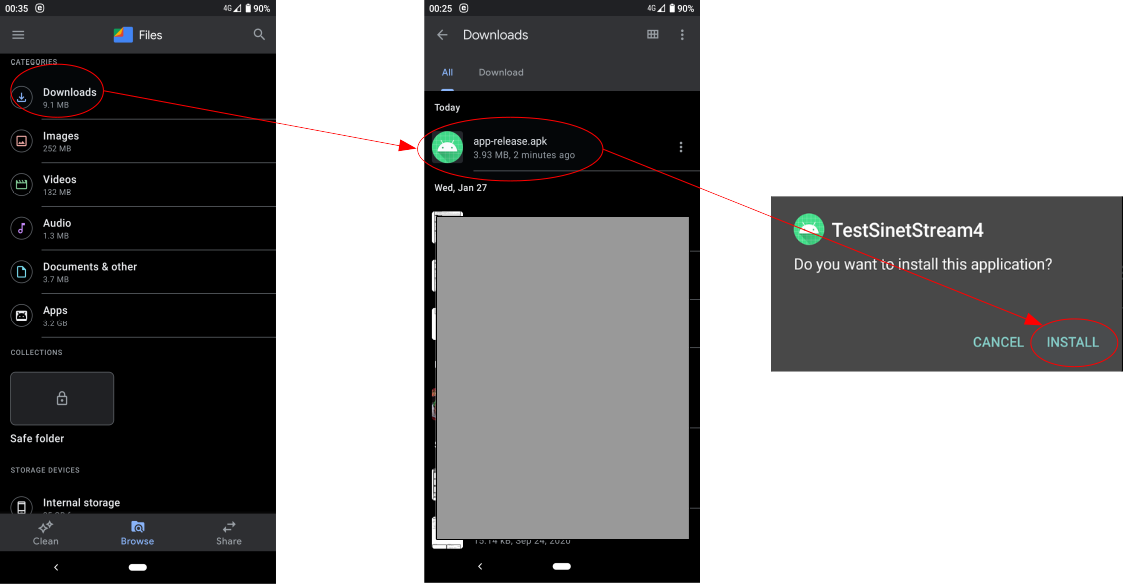
The above figure is a sample. Read application names accordingly.
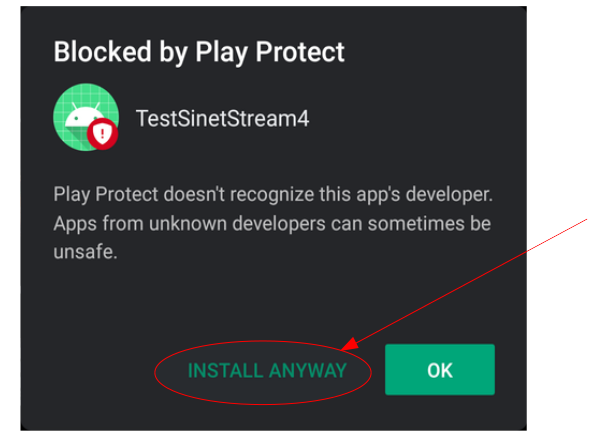
Because this is a direct installation from a private repository, instead
of the Google Play, a confirmation dialog
Google Play Protect
immediately pops up (The figure below).
This dialog asks if you are willing to install an application
from unknown developer.
The tutorial applications are developed by ourself, the National
Institute of Informatics (NII), so just click INSTALL ANYWAY
and go ahead.
This Play Protect confirmation is done at the first installation
time only.
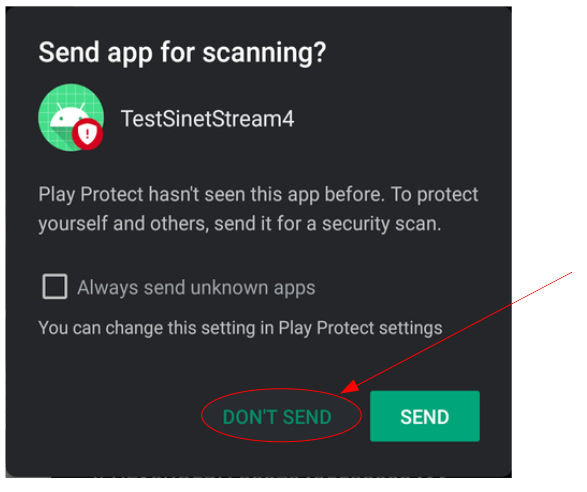
Now, another confirmation dialog pops up (The figure below).
This is a check if you want scan this application and send the result
to the Play Protect.
Click DONT SEND to skip. This application scanning procedure also
done at the first installation time only.
Now you are done! When everything has finished, a toast message which tells “installation succeed” will be briefly shown.
<Reference>
Help protect against harmful apps with Google Play Protect
5. Install an APK by building from source
5.1 Preparations for the Android development environment
Install the latest Android Studio to your workstation (Windows, Mac, Linux or Chrome OS). Beware the system requirements such like operation system version, CPU type and memory amount.
<Reference>
Install Android Studio
5.2 Get the source code
Sample applications in this tutorial are publicly available on GitHub.
Download the entire source tree by git command to your workstation.
- STEP1:
Echo(sinetstream-android-echo)PC% cd $HOME/StudioProjects PC% git clone https://github.com/nii-gakunin-cloud/sinetstream-android-echo.git - STEP2:
Sensor(sinetstream-android-sensor-publisher)PC% cd $HOME/StudioProjects PC% git clone https://github.com/nii-gakunin-cloud/sinetstream-android-sensor-publisher.git
5.3 Load the source tree into the Android Studio
Once the Android Studio has started, initial window pops up.
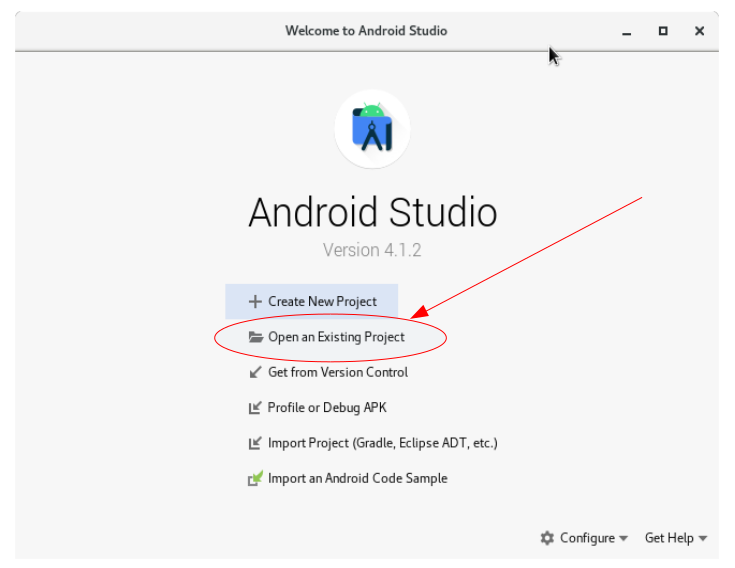
If you click Open an Existing Project, file explorer dialog pops up.
Choose the directory for the previously downloaded source tree.
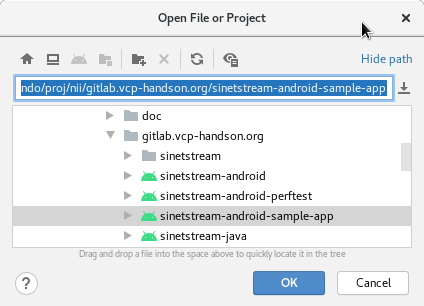
The above figure is a sample. Read file/directory names accordingly.
5.4 Preparations on the Android device
To install the APK to the target Android device, you need to enable
the USB debugging in the Developer options.
Due to the sensitive nature of Developer options, this is a hidden
option in the Android Settings screen.
Take the following steps.
- Enable developer options
Home --> Settings --> About phone --> Tap the `Build number` item 7 times in a row. --> Input the unlock screen code - Enable USB debugging
  Home
  --> Settings
    --> About phone
      --> System
        --> Expand the `Advanced` menu
          --> Developer options
            --> USB debugging
<Reference>
Configure on-device developer options
5.5 Build and install an APK to the Android device
-
Connect the target Android device to your workstation by a USB cable. Beware
screen lockis cleared beforehand. -
If the target Android device is
USB debuggingenabled, theAndroid Debug Bridge (adb)challenges for the device authentication. -
Answer
OKto the confirmation dialog on the target Android device, so that the device is recognized by theadb. -
In the
Android Studiowhich currently opens the sample application project, press theRUNbutton (the green triangle toward right) to build anAPKand install it to the Android device.
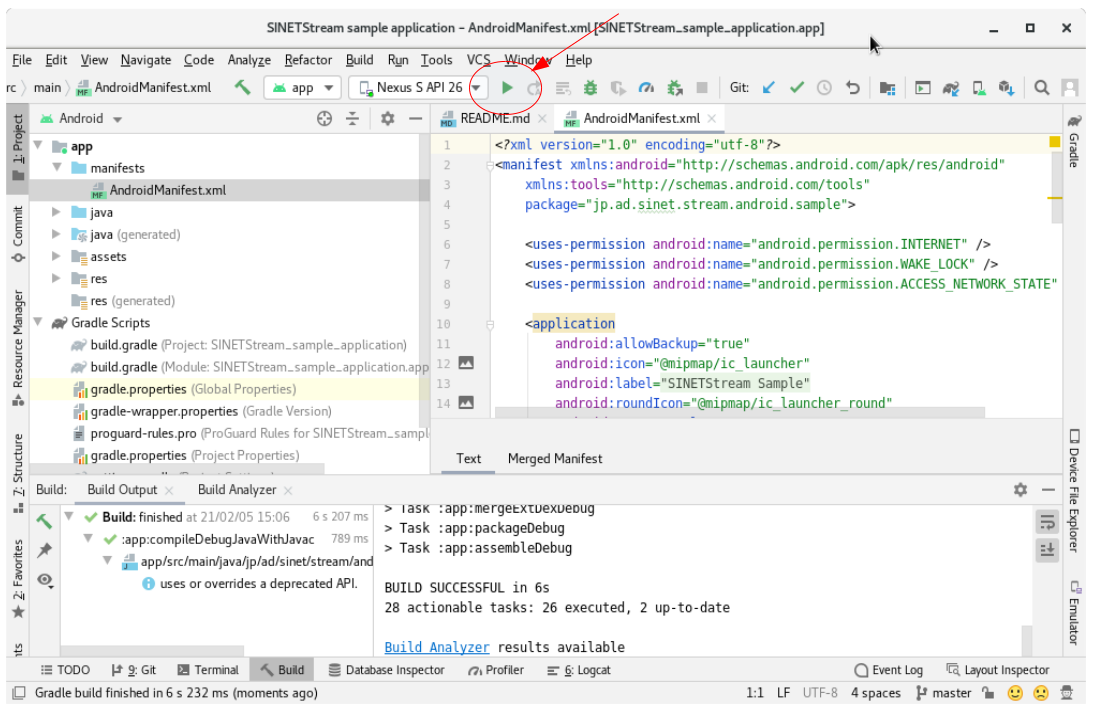
The above figure is a sample. Read file/directory names accordingly.
<Reference>
Run apps on a hardware device
Appendix
A1. Additional setup for the SSL/TLS communication with the broker
Depending on the security policy for the broker operation, you need to install the required SSL/TLS certificate files on your Android device beforehand. See the following link for details.
Installation of certificates in the system credential storage